March 24, 2014

banana pudding pie with white chocolate macadamia topping

Happy Monday! I hope you had a good weekend! We sent all three of our kiddos off in different directions for Spring Break mission trips. One went to Mexico, one to Guatemala, and another to inner-city Memphis - which is likely the most dangerous place of all of them. Y'all be praying for my babies and all of the others who are serving somewhere this Spring Break, will ya?!

So between washing and packing kids and working on the Euna Mae's store, I hardly cooked a single bite last week. But boy, did all of that change this weekend. Kids were gone. Sam and I are here a-l-o-n-e. The weather has taken a beautiful turn. And I got the itch. I cooked all weekend; and it was therapeutic. Now I will say that we were busy as bees running errands and working through lists for the Euna Mae's store. So I didn't labor all day on any of my cooking. It wasn't that kind of weekend where I stand leisurely in the kitchen cooking a little all day long. Nope, we were on the move. Marking off tasks. And we were beat. So everything I fixed was easy but with BIG flavor. Starting with this banana pudding pie with white chocolate macadamia topping that I made for my painters who have worked sun-up to sun-down for days in our building. And it came in especially handy when I had to tell them that someone had swiped a finger on the checkout counter to "see if it was still wet" and left a big, long finger-swipey mark on their perfectly smooth surface that was, in fact, still wet. (eh-hem, Sam.) So being able to hand over a banana pudding pie while asking them to repair the finger-swipey made it a little less humiliating. 

This banana pudding pie is simple, rich, creamy, and not-too-banana-y.  This pie is an easy combination of store-bought fixins and a pre-made shortbread crust. So when I say it's simple, I mean it. I made homemade whipped cream for the top which I absolutely urge you to do rather than whipped topping. That little touch of homemade takes this virtually-pre-packaged pie over the moon. And you'll be so proud of having made homemade sweetened whipped cream. Another plus to this recipe is that it makes two pies! One to keep and one for a sharing batch! Or you can keep both pies if you're hosting a dinner or Easter...because your company will eat every bite of both pies. I just know it. 
 
BANANA PUDDING PIE WITH WHITE CHOCOLATE MACADAMIA TOPPING
{makes two 8" pies}

Two 8" pre-packaged shortbread pie crusts
1 3.5oz package vanilla instant pudding, not sugar free
1 1/2 cup half and half
1 8oz  package of cream cheese, room temperature
 1 small can sweetened condensed milk like Eagle Brand
1 8oz carton whipped topping like Cool Whip, thawed
1 teaspoon good vanilla extract
6 bananas, thinly sliced
3-4 white chocolate macadamia nut cookies like Pepperidge Farm

one Euna Mae's recipe for homemade sweetened whipped cream

In a medium mixing bowl, whisk together the pudding mix with the half and half; set aside.
In a large mixing bowl, combine the cream cheese and sweetened condensed milk. Whisk together until smooth. It's imperative that the cream cheese be room temperature so it doesn't clump. Whisk til your arm hurts so it's as smooth as possible (or use a hand-held mixer.) Whisk in the pudding mixture and the vanilla until combined and smooth. Gently fold in the thawed whipped topping and sliced bananas.  Divide the pudding pie filling between the two shortbread pie crusts; set aside.
Prepare the recipe for homemade sweetened whipped cream; and carefully spread the centers of each pie with whipped cream. In a zip-top bag, crush the white chocolate macadamia nut cookies with a heavy spoon or roll over them with a rolling pin; and sprinkle them across the tops of the pies.
Refrigerate for at least 3 hours or overnight.

March 21, 2014

euna mae's store progress pictures!


What a week! What a week! It started with a whirlwind trip to Chicago with my honey-cakes to attend the International Home + Housewares show. We met with major national brands like Le Creuset, Staub, Nordic Ware, Calphalon PLUS some neat smaller retailers who make beautiful products for kitchens and keeping. It was a dream. I wore a name badge that said "Euna Mae's" and I got to say over and over that I was opening a "specialty kitchen store". Isn't that fun?! I said it over and over. And this whole store-thing started to feel real!

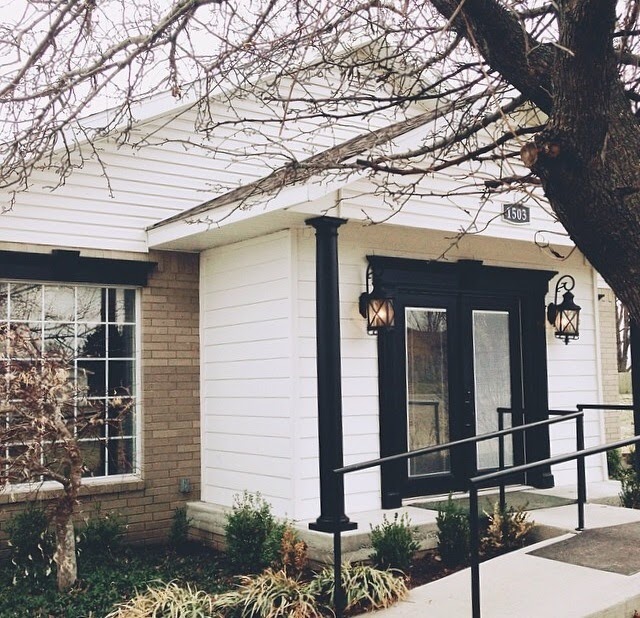
Then....we came home and got to take possession of my building! And oh brother, did it feel real then! Black front doors and columns that will get a new face. A big empty storefront with dark gray walls and dark gray ceilings in need of sheetrock repair.  And it began. Patching, texturing, and taping off to be coated a creamy alabaster white. And my carpenter delivered the custom cabinets, shelves, and checkout counter that I had designed for him weeks ago. I literally jumped and squealed, jumped and squealed. I can just see it all in my head, and I'm over the moon!
Can you believe how much just the cabinetry changed things?! There is a T-O-N to do between now and opening, which looks to be early May. So I'm somewhere between panic and heaven. But I'm excited. (I have used and will use the word "excited" entirely too many times. But I'm excited!) I'm regularly posting progress pictures and product updates on my @eunamaes instagram throughout the week, but I thought I'd give the rest of you non-IGers a peek too. Check out hashtag 'eunamaescomingsoon' for all of the images!

In the meantime, we're eating quickie meals. Nothing that you would want to see or repeat in your own homes. Trust me. Although, I did make a mean pan of creamy chicken enchiladas last night that we scarfed down. I'm itching in a big way to make something coconut soon. As soon as I see daffodils, I start tasting coconut. Is it just me?! 

So here are a couple of progress pictures from this week! By next week it'll all be painted! Eeeeee! Thanks for hopping in the with me on this adventure. It's so fun for y'all to be a part!

Have a good weekend! And somebody please make a coconut cake and think of me. {smooch}

March 14, 2014

Dutch Apple Pie

It's National Pi Day where mathematicians celebrate that fancy little symbol that represents something I never understood in school. I was never any good at math (sorry, Mrs. Wegerer!), but I can make good crust and good conversation. So that's gotta count for something, right?! So today we celebrate PI(e) Day the Euna Mae way!

Although I have reallllly been itching to make coconut cream pie with Easter on the horizon and warmer, sunnier days, I felt like the most appropriate pie for National Pi Day should be something more American, more classic...a pie that you can make and eat year round. So Dutch Apple pie is it! It's a little bit crust, a little bit crumble, and a whole lotta cinnamon-sugary apples. Dutch Apple pie somehow spans the seasons being perfect for Thanksgiving and Christmas as well as lakeside in the summer with a big melty scoop of homemade vanilla ice cream. It's one of my very absolute favorites. And it might be delicious for breakfast with a cup of coffee before everyone wakes up. Not that I would know. So. Good.

So Happy Pi(e) Day and have a good weekend! Be sure to follow @EunaMaes on instagram and follow along my trip to the International Home + Housewares Show in Chicago this weekend! 


DUTCH APPLE PIE
{makes one 9 - 9.5" pie}

-for the crust-
Recipe for 1 homemade pie crust OR 1 premade pie crust 
 
-for the filling-
5 Granny Smith apples, peeled, cored, and thinly sliced
4 Pink Lady, Gala, or Honeycrisp apples, peeled, cored, and thinly sliced
1 Tablespoon fresh lemon juice
1/2 cup flour
 1/2 cup brown sugar
1/2 cup granulated sugar
1 teaspoon cinnamon
1/4 teaspoon nutmeg
1/4 teaspoon ginger
1/2 teaspoon salt
1 tablespoon unsalted butter, cut into small pieces

-for the crumble topping-
 Recipe for My Favorite Brown Sugar Crumble Topping

Preheat oven to 425 degrees. Position your oven rack to just one rung below middle.

Fit a single pie dough disc into the bottom of a 9 or 9.5" pie dish. Do not use a 10" pie dish. Press into the dish, crimp edges, and put in the freezer while you make the filling and crumble.

Next, follow instructions for the brown sugar crumble topping; set aside.

For the filling, place sliced apples in a large mixing bowl and toss them with the lemon juice. Stir in the 1/2 cup flour and stir to coat the apples. Be sure apples are coated nicely.  In a medium mixing bowl, whisk together the brown sugar, sugar, cinnamon, nutmeg, ginger, and salt. Pour over the coated apples and stir together well.  Remove the chilled crust from the freezer and spoon the apple mixture into the pie dish, making sure that every bit of the sugary/floury stuff in the bottom of the bowl gets in the pie. I always use my (clean) fingers to reposition the apples, making sure they lie nicely in the dish. The apples should fill up the dish. Dot the pie filling with butter pieces. Then spoon the brown sugar crumble topping onto the top of the pie, making sure to cover all of the apples all the way around the top of the pie. Be very liberal with the topping. It might secretly be my favorite part of this whole pie! 

Place the pie on a baking sheet and bake in a 425 degree oven for 20 minutes. Then reduce the temperature to 375 degrees and bake another 35-40 minutes until the pie filling is bubbling and the crust/topping is golden brown. Check the pie occasionally to see if the crust/crumble is browning too much; if so, just lay a loose piece of foil over the pie to shield it from getting any darker. Then let it continue to bake. 

Remove from oven and allow to cool on the sheet pan until the filling stops bubbling; then move to a cooling rack to cool for 3 hours before serving.

March 10, 2014

euna mae's 30-minute meals: spinach artichoke chicken pasta

I like to make Sunday lunch. It's one of the ways I like to show my husband that I love and appreciate him after he has taught three services at our church. I also like to have all of us eat together around the table, visiting, laughing, enjoying our bites, talking about our previous weeks, and getting our bearings for the coming week. I usually get home about 11:45 before the rest of my crew arrives around 12:30. And when they get home, they are starving. What is it about Sundays that make your stomach growl more than other days of the week? 

So I have a few quick meals that are not only perfect for Sunday lunch but also for busy weeknights when we're somewhere between school, track meets, baseball practice, board meetings, home group, football games, and the gazillions of other activities that Hannons are involved in. This spinach artichoke chicken pasta is one of our favorites. Inspired by my very favorite dish at a local Italian restaurant, this pasta is flavorful, hearty, and creamy, with freshness from lemon zest and a handful of grape tomatoes right on top. What makes this pasta dish so quick is that it is about 75%  pre-made food that you just crack open and cook and about 25% fresh food that is easy to chop and toss in for big flavor. And it makes about eight good-sized bowls. Serve with warmed crusty bread and a salad, and you're all set with a beautiful meal on the table in a half-hour! And if you're lucky, you'll have a single size portion left for lunch the next day like I do today! So. Excited.

Real quick before I post this semi-homemade recipe....There is a luscious homemade version of this dish that features homemade alfredo sauce with heavy cream, butter, lemon, and parmesan all thick and melty and divine. And you may also choose to roast your own chicken like I showed you here.  On weekends I will make the entire homemade version of this dish -  when I have the luxury of time and I'm just feeling the need to have my hands in every step. But for the sake of time and feeding hungry loved ones, this quick and easy 30-minute recipe is a dream!

SPINACH ARTICHOKE CHICKEN PASTA
30-MINUTE MEAL

{pre-packaged ingredients}
1 family-sized rotisserie chicken from the deli
1lb. penne pasta
2 jars of your favorite alfredo sauce (I use four cheese)
1 14oz. can artichokes, drained
4-5 cups bagged fresh spinach
2 Tablespoons capers, optional
1/2 cup shredded parmesan cheese plus more for sprinkling
 2 tablespoons butter
2 tablespoons olive oil
1 teaspoon Creole seasoning such as Tony Chachere's

{fresh ingredients}
1 small yellow onion, chopped
2 cloves garlic, minced
grape tomatoes
zest of one lemon

In a large pot, boil the pasta in salted water for 12 minutes until al dente. While the water is coming to a boil and the pasta is cooking, heat the butter and olive oil in a large saute pan or skillet over medium-low heat. Chop the onion and the garlic and give the drained artichokes a rough chop. Add the onion to the pan and saute for a few minutes until translucent and tender. Add the garlic and artichokes and saute, making sure the garlic doesn't burn. (It will burn if you look away and stop stirring.) Add the spinach stirring to wilt down. If you have to add it in two batches to make room, then that's fine. It will wilt down by more than half. Stir the onions, garlic, artichokes and spinach together well. 
(Check the pasta for doneness and drain if necessary.) 
Pour the the jars of alfredo sauce in the pan with the spinach mixture. Add a little of the pasta water to each jar, and shake with the lid on to remove the rest of the good sauce inside the jar; pour into the pan. Stir the sauce and the spinach mixture together until combined. Season with Tony Chachere's seasoning. (I use this seasoning in a lot lot LOT of dishes!) Bring to a low simmer and add the parmesan cheese (and capers if you wish), stirring well until the parmesan has melted and the sauce has come together.  Reduce heat to low and cover. Check the pasta for doneness; it should be ready at this point to be drained.
In your biggest serving bowl or mixing bowl, add the drained pasta, then pour the cream sauce over it and stir to combine. Remove the breasts from the rotisserie chicken and tear apart with your hands into pieces, adding to the bowl. Stir well. Zest one lemon over the pasta and stir once more. Serve in shallow pasta bowls with another sprinkle of shredded parmesan cheese and fresh grape tomatoes.

March 07, 2014

classic french toast


Just this week, I told my husband as soon as we sat down to this breakfast that I think french toast is one of the things that I love to make the most. I love the entire process. Every step. The whisking together of fresh sweet ingredients. The soaking of the bread. The sizzle in the cast iron skillet when the sweet, soaked bread hits the pan. The beautiful browning. And the plating of perfectly-toasted-but-moist-inside slices covered in warmed syrup and topped with sugared berries. I love it. All of it. Then to top it off - I get to sit down an enjoy a plate, savoring every sweet bite! Isn't it so pretty?! I'm swooning again. I can't help it.

French toast is a dish that I usually make for Saturday morning breakfast. But as pretty and fresh and sweet as it is, I think it also makes a very unexpected, rustic, Southern dessert. Gosh, a big dollop of homemade sweetened whipped cream and who wouldn't want to dive in with a fork and a cup of good decaf?! 

And most of us have everything we need to make this dish right in our fridges and pantries! Bread, eggs, milk or cream, vanilla, cinnamon, sugar, salt, and syrup! Don't you have all of those things right now?! See, I told ya. The heartier the bread the better, but sandwich bread will do in a pinch. I've made french toast with cinnamon raisin bread, leftover sourdough or Italian loaf from the deli, Texas toast, and even croissants! French toast is a perfect way to use up whatever bread is about to go bad. In this case, I sliced a loaf of homemade sourdough bread that I made with my friend Mrs. Kathy from my church. It was divine! Every bite. And it turned out so pretty that I thought it'd be a perfect recipe to share with you for your weekend! Serve this dish with a side of bacon, and it's over-the-moon good!

CLASSIC FRENCH TOAST
{serves 4-6 people, depending on your people}

8 slices of day-old bread, approximately 3/4-1" thick
1 1/2 cup half and half, or at least 2% milk (not skim or 1%)
4 large eggs
1 teaspoon sugar
1/2 teaspoon cinnamon
1/4 teaspoon salt
2 teaspoons good vanilla
several tablespoons of butter for cooking + more for serving

Preheat oven to 300 degrees to create a warm, holding area for the french toast slices as they come off the pan. Place a wire rack inside a baking sheet; set aside.
Preheat a nonstick pan or a seasoned cast iron skillet over medium-low heat. (I use cast iron, and I think you can't beat it!)
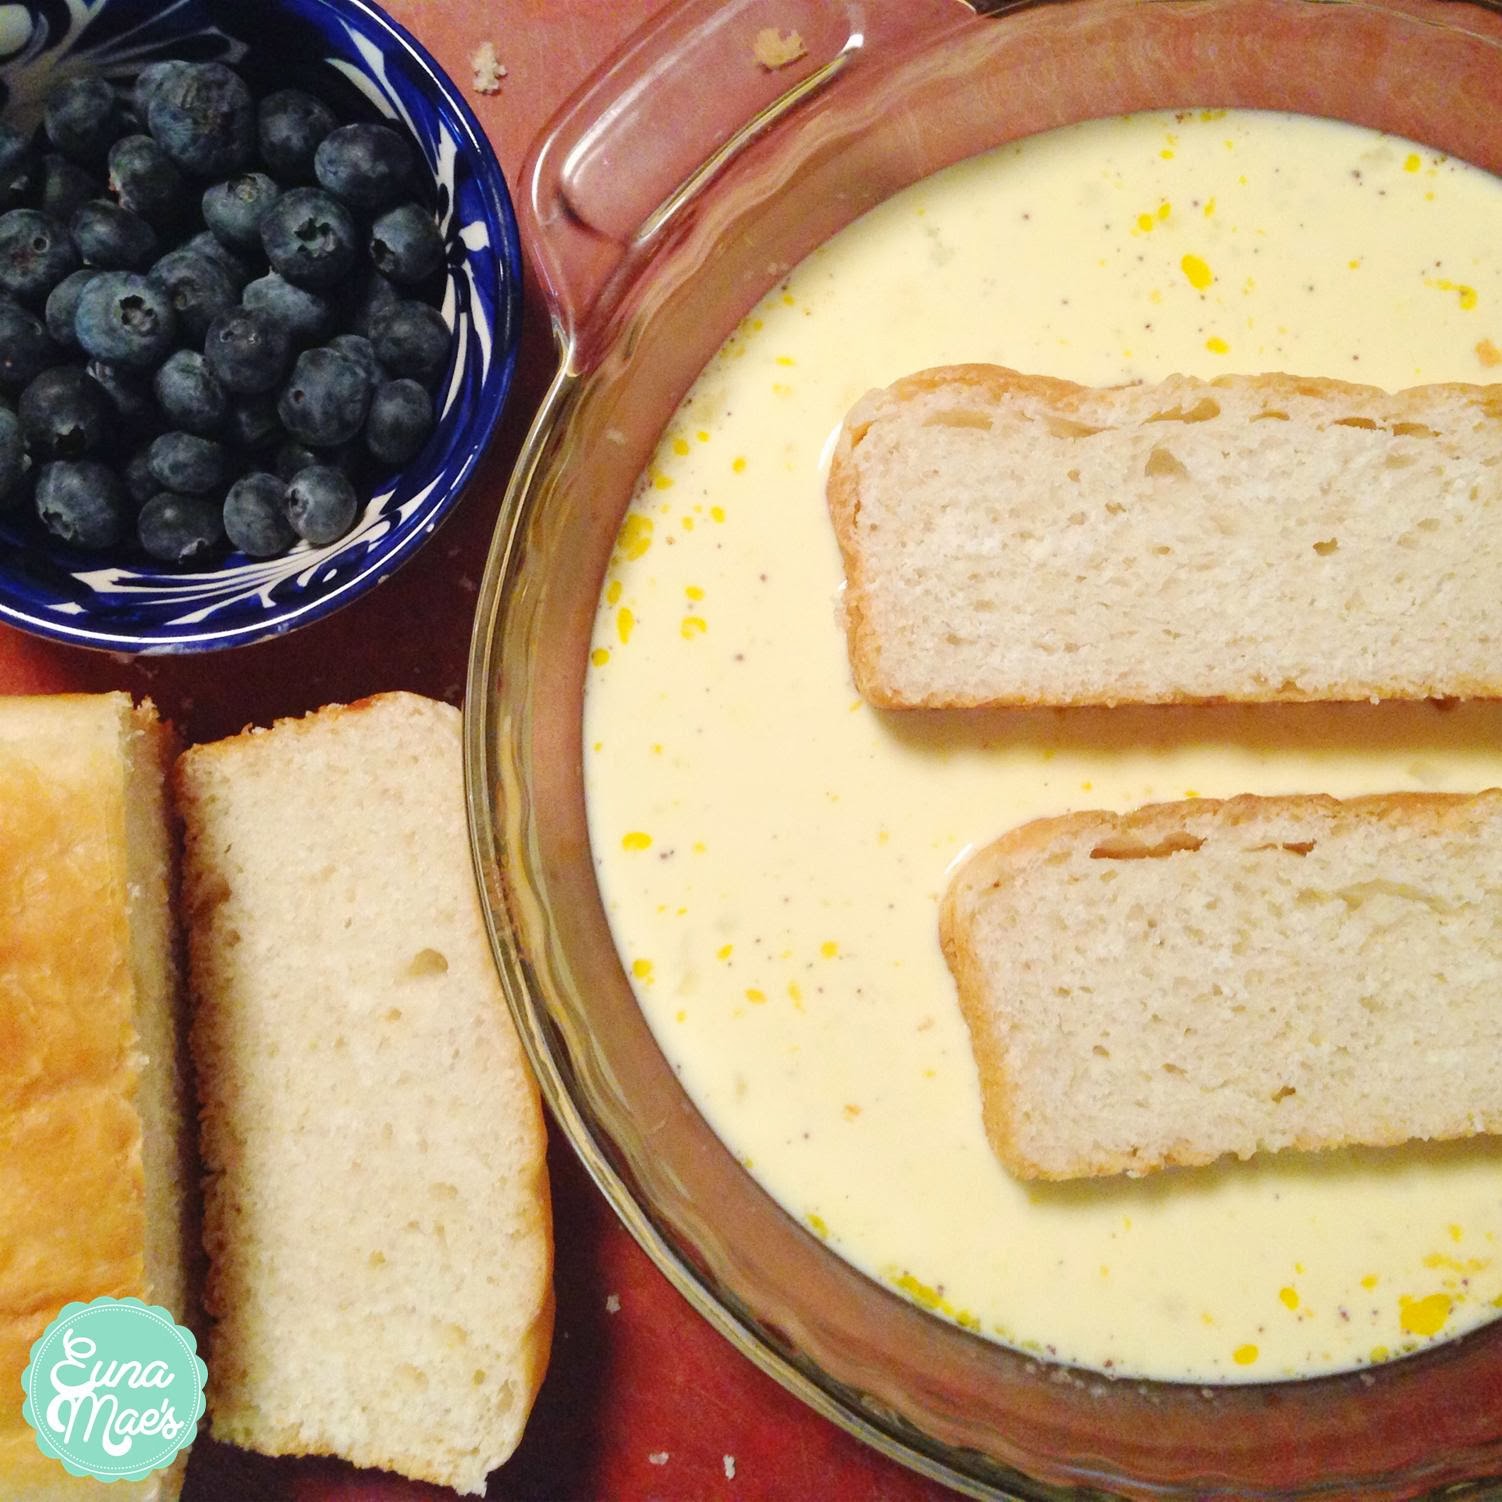
In a medium mixing bowl, combine half and half (I use fat-free), eggs, sugar, cinnamon, salt, and vanilla. Whisk together til combined, and pour custard into a pie dish or 8x8 baking dish. Working with two pieces of bread at a time, lay the bread in the dish and allow to soak on each side for 30 seconds. Melt 1 tablespoon of butter in the preheated pan, and place the two pieces of soaked bread in the skillet, cooking until golden brown on each side. 
Remove the french toast slices and place them on the baking sheet/wire rack and store in the warmed oven while you prepare the rest of the bread. 
Soak, cook, warm two pieces of bread at a time until all 8 pieces are finished and stored on the wire rack. Serve immediately topped with warmed syrup and berries and dusted with a powdered sugar. Or serve with homemade sweetened cream for an extra treat! 


March 06, 2014

raspberry sour cream pie with brown sugar crumble


This pie.  This. Pie.

This pie was introduced to my marriage almost ten years ago when Kelli Maestri made it for our home group. And I say it was introduced into my marriage because it affected my husband in a big way. Sam has never EVER gone on and on about a pie in his life like he did about this one. And listen to me, he went on and on about it. He begged her to make it at least twice during our year with her in small group. He sweet-talked her into making one for his birthday one year, and she gave in. He spoke randomly about it out of nowhere as if he were daydreaming. I think he even mentioned it in a sermon one Sunday morning in front of thousands. Eventually the tone turned into challenge for me to learn how to make "Kelli's raspberry pie."  And by gosh, I was gonna learn how to make that darn pie if it killed me. I searched high and low for a recipe that was similar. I tweaked and changed and dappled with recipes so that it was just right. And I'm happy to say that, in my raspberry-pie-envy, I have settled on this recipe for raspberry sour cream pie with brown sugar crumble. And it's money, y'all.

As soon as I get this recipe posted, I'm going to my kitchen to make one for my smart, strapping, hunk-of-a-husband because we have a reason to celebrate! He has worked for years on his masters and doctorate, and he is on his way home after having defended his thesis just this morning at Gordon-Conwell Theological Seminary in Boston. So come May, he'll graduate with his Doctorate of Ministry in preaching. But defending his thesis was a big hump that he had to get over. So we're celebrating with pie! His very favorite pie!

Before I share my version of "Kelli's raspberry pie" I want y'all to know that if you live in Northwest Arkansas you can order pies from Kelli at Pippin Apple Pies on Facebook. Her crust is perfection. And she's a good gal.

RASPBERRY SOUR CREAM PIE WITH BROWN SUGAR CRUMBLE
{makes one 9 or 9.5" pie}
I almost always double this and make two pies at a time.

recipe for one unbaked pie crust
2 large eggs, room temperature
1 1/3 cups whole sour cream
1 teaspoon good vanilla extract
1 cup white sugar
1 pinch salt
1/3 cup flour
3 cups raspberries (fresh or frozen, see note in recipe below)

-for the topping-
1/2 cup brown sugar
1/2 cup flour
1/2 cup chopped walnuts
1/4 cup butter, cut into small cubes and chilled

Preheat the oven to 400 degrees.
If you're using fresh raspberries, rinse them and sprinkle them with a little sugar. Allow them to sit at room temperature while you make the rest of the pie. Then using a fork, mash the raspberries a little so they're not completely whole and to release a little juice.
If you're using frozen raspberries, allow them to thaw at room temperature. Add 1 teaspoon of sugar to them because frozen raspberries are often more tart than fresh raspberries. 

Fit the pie crust into a 9 or 9.5" pie plate, crimp edges, and store in the freezer until time to pour in the filling. I don't suggest a deep dish pie plate or a 10" pie plate for this pie.

In a large bowl, beat the eggs until light and they look lemon-colored. Whisk in sour cream and vanilla. In a separate bowl, mix sugar, flour and salt together. Combine the flour mixture into the egg mixture and stir in raspberries. When stirring in the raspberries do not pour the entire bowl upside down into the mixture. You want juicy, macerated raspberries but you don't want all of the juice that has settled in the bottom of the bowl to be poured into the pie filling or it'll be too wet and won't set. 

Remove the pie crust from the freezer and pour in the raspberry filling. Bake in a preheated oven for 30-35 minutes or until the center just begins to set. Remove from the oven and gently cover the top of the pie in the brown sugar crumble. Return to the oven for 10-15 minutes more until the topping is golden brown. Allow to cool completely at room temperature before serving.

-for the topping-
While the pie is baking, mix together the brown sugar, flour, and walnuts in a medium bowl and cut in the butter pieces using two forks or a pastry blender. Blend until it's crumbly.


March 03, 2014

buttery, brown sugar, ham and cheese sliders

I posted this picture on the Euna Mae's instagram (@EunaMaes) a few weeks ago, thinking most of you probably already knew about this little gem-of-a-recipe. But surprisingly, several of you asked about it!  I think I've been making pans of these guys for at least fifteen years or more. I can remember having them for the first time when my friend Corrie made them for a shower back when we were all having our babies. I wrote down the recipe right away and still make them to this day.

For those of you who are in the know about these buttery, brown sugar, ham and cheese sliders, then you know how warm, melty, tangy and brown-sugary they are. And you also know how they feed an army and how they travel like a charm if you need to make-and-take them somewhere. You know how they are perfect for not only lunch and dinner but how they are just as easily perfect for breakfast. And best of all, you probably know how simple they are to make. Like, super duper easy as they can be! 

Now you see why I've made them forever and ever.

For those of you who are not in the know about these buttery, brown sugar, ham and cheese sliders,  then I am over the moon about getting to share them with you!

{sharing batch recipe} Double up and make two pans for a Sharing Batch! Just assemble the sandwiches, sauce them, and cover them with foil. Then include bake temp and time when you deliver them.  Send these sliders with a pot of soup or a pretty fruit salad!


BUTTERY, BROWN SUGAR, HAM AND CHEESE SLIDERS
makes 24 sliders
{feeds 6-8 people depending on your people}

2 packages of King's Hawaiian Sweet Dinner Rolls
1 lb. shaved deli ham
1 lb. swiss or provolone, thin slices

-for the sauce-
2 sticks butter
2 Tablespoons dijon mustard
2 teaspoon worcestershire
2 teaspoon dry onion flakes
1 teaspoon garlic powder (not salt)
3/4 cup packed brown sugar
poppy seeds, optional 

Preheat oven to 350 degrees.

In a medium microwavable bowl, melt the butter and whisk in the mustard, worcestershire, onion flakes, and brown sugar. Set aside.

Spray two 9x13 pans with baking spray.  Then using a long serrated knife, cut the entire package of rolls in half creating tops and bottoms like little buns. Place one 'bottom' of the rolls in one pan, and one 'bottom' of the rolls in the other pan. {I have one big huge 12x16 baker that I smash all 24 rolls into.} Then layer the bottoms with ham, and top with cheese slices. Place the top halves of the the rolls on, and then drizzle the sandwiches with the warm, buttery sauce. You may sprinkle the pan of the sauced sliders with poppy seeds if you choose.  {At this point, you may refrigerate overnight if you need to! Isn't that convenient and versatile! I love these!} Bake for 20 minutes covered in foil. Then remove foil and bake 5-6 more minutes til the tops just start to get some color.